As a trusted gas regulator supplier, I understand the importance of maintaining the optimal performance of these crucial components. A well - maintained gas regulator not only ensures the efficient operation of your gas - powered appliances but also enhances safety. In this blog, I'll guide you through the process of cleaning a gas regulator.
Why Clean a Gas Regulator?
Before diving into the cleaning process, it's essential to understand why cleaning a gas regulator is necessary. Over time, gas regulators can accumulate dirt, dust, debris, and even corrosion. These contaminants can interfere with the regulator's internal mechanisms, leading to inaccurate pressure regulation. This, in turn, can cause issues such as inconsistent flame quality in a BBQ Gas Regulator, inefficient fuel consumption, or even pose a safety hazard. Regular cleaning helps to prevent these problems and extends the lifespan of your gas regulator.
Tools and Materials You'll Need
To clean a gas regulator effectively, you'll need the following tools and materials:
- Safety goggles and gloves: These protect you from any debris or cleaning agents.
- Screwdriver set: Different types of screws may be used to secure the regulator, so having a variety of screwdrivers is essential.
- Soft - bristle brush: A toothbrush or a small paintbrush can work well for removing loose dirt and debris.
- Cleaning solution: You can use a mild detergent mixed with water or a specialized gas regulator cleaning solution. Avoid using harsh chemicals that could damage the regulator.
- Compressed air canister: This is useful for blowing out any remaining debris from hard - to - reach areas.
- Clean, lint - free cloths: For wiping down the regulator after cleaning.
Step - by - Step Cleaning Process
Step 1: Safety First
Before you start cleaning the gas regulator, ensure that all gas appliances connected to it are turned off. Then, shut off the gas supply at the source. This could be a propane tank valve or a natural gas shut - off valve. It's also a good idea to let the regulator cool down if it has been in use recently to avoid any potential burns.
Step 2: Remove the Gas Regulator
Using your screwdriver, carefully remove the gas regulator from the gas appliance or the gas source. Take note of how the regulator is connected and any washers or gaskets that are present. Place these small parts in a safe place to avoid losing them.
Step 3: Inspect the Regulator
Once the regulator is removed, visually inspect it for any signs of damage, such as cracks, dents, or excessive wear. If you notice any significant damage, it's best to replace the regulator rather than attempting to clean it. Check the inlet and outlet ports for any blockages or debris.
Step 4: Clean the Exterior
Use the soft - bristle brush to gently remove any loose dirt, dust, or debris from the exterior of the regulator. Pay special attention to the areas around the ports and the adjustment screw. If there are stubborn stains, dip the brush in the cleaning solution and gently scrub the affected areas. Be careful not to get the cleaning solution inside the regulator at this stage.
Step 5: Disassemble the Regulator (if possible)
Some gas regulators can be disassembled for a more thorough cleaning. Refer to the manufacturer's instructions to see if your regulator can be taken apart. If it can, carefully remove the cover, diaphragm, and other internal components. Place these parts in a container filled with the cleaning solution and let them soak for about 15 - 20 minutes.
Step 6: Clean the Internal Components
After soaking, use the soft - bristle brush to clean the internal components. Pay close attention to the diaphragm, as any damage or dirt on it can affect the regulator's performance. Gently scrub the parts to remove any dirt or grime. Rinse the components thoroughly with clean water to remove the cleaning solution.
Step 7: Dry the Components
Use a clean, lint - free cloth to dry the internal components. Make sure they are completely dry before reassembling the regulator. You can also use the compressed air canister to blow out any remaining moisture from hard - to - reach areas.
Step 8: Reassemble the Regulator
Once all the components are dry, carefully reassemble the regulator. Make sure to install the diaphragm, cover, and other parts correctly. Replace any washers or gaskets that were removed during disassembly.
Step 9: Clean the Ports
Use the compressed air canister to blow out any remaining debris from the inlet and outlet ports of the regulator. This helps to ensure that the gas can flow freely through the regulator.
Step 10: Reinstall the Regulator
After cleaning and reassembling the regulator, reinstall it on the gas appliance or the gas source. Make sure it is securely fastened and that all connections are tight.
Step 11: Test the Regulator
Once the regulator is reinstalled, turn on the gas supply at the source. Check for any gas leaks around the connections using a gas leak detector or a soapy water solution. If you see bubbles forming, there is a leak, and you need to tighten the connections or replace the washers. Then, turn on the gas appliance and check if it is operating correctly. Observe the flame quality and make sure the pressure is stable.
Maintenance Tips for Gas Regulators
- Regular inspections: Conduct visual inspections of your gas regulator at least once a month. Look for any signs of damage, wear, or dirt accumulation.
- Cleaning frequency: Depending on the usage and the environment, clean your gas regulator every 6 - 12 months. If you use your gas appliances frequently or in a dusty environment, you may need to clean the regulator more often.
- Store properly: When not in use, store your gas regulator in a clean, dry place. Protect it from dust, moisture, and extreme temperatures.
Different Types of Gas Regulators
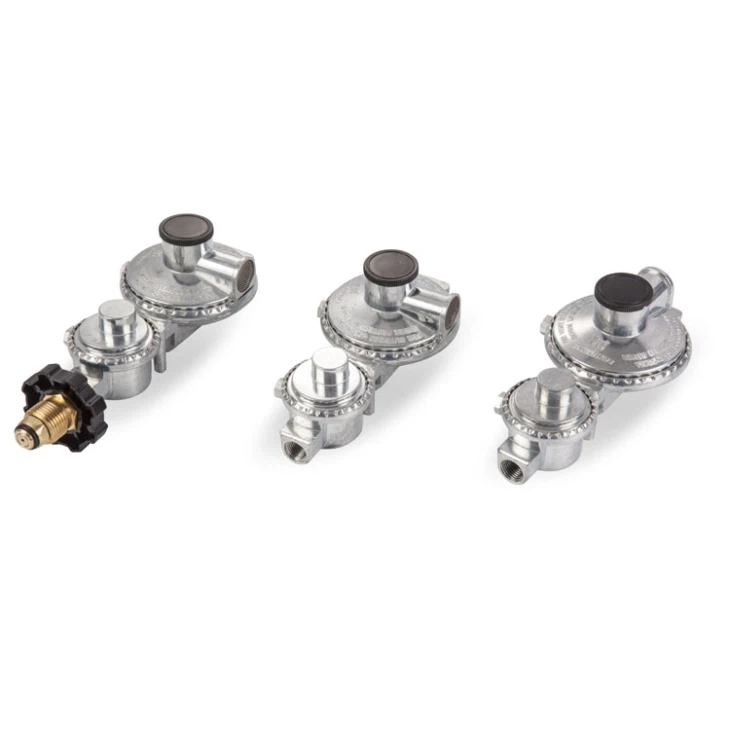
There are various types of gas regulators available, each designed for specific applications. For example, a Two Stage Propane Regulator is ideal for applications where a consistent pressure is required, such as in large - scale propane - powered equipment. A Twin Propane Tank Regulator is used when you have two propane tanks and want to ensure a continuous supply of gas. The cleaning process for these regulators is generally similar, but it's always important to refer to the manufacturer's instructions for specific details.
Conclusion
Cleaning a gas regulator is a relatively simple process that can significantly improve its performance and safety. By following the steps outlined in this blog, you can keep your gas regulator in top condition. As a gas regulator supplier, I'm committed to providing high - quality products and sharing valuable knowledge with our customers. If you have any questions about gas regulators or need assistance with choosing the right one for your needs, feel free to reach out to us. We're always happy to help you make an informed decision and ensure the smooth operation of your gas - powered appliances. Whether you're in the market for a BBQ Gas Regulator, a Two Stage Propane Regulator, or a Twin Propane Tank Regulator, we have a wide range of options to meet your requirements. Contact us today to start the procurement process and discuss how our gas regulators can benefit your setup.

References
- Gas regulator user manuals from various manufacturers
- Industry standards and guidelines for gas regulator maintenance


